tutorials
Step 1: Ready…
Let’s get you ready for your journey! We bootstrap OpenUI5 in an HTML page and implement a simple “Hello World” example.
Preview
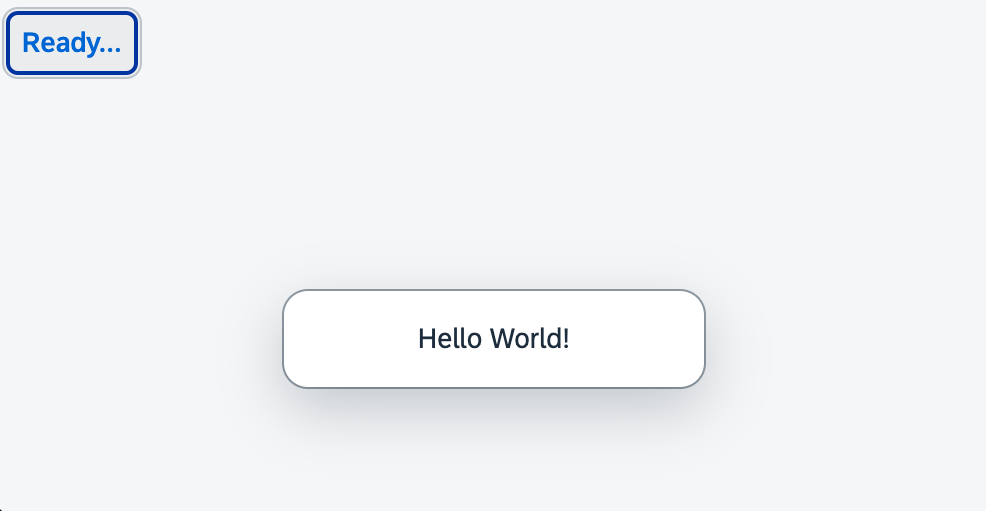
You can access the live preview by clicking on this link: 🔗 Live Preview of Step 1.
Coding
You can download the solution for this step here: 📥 Download step 1 (TS)📥 Download step 1 (JS). ***
App root folder (New)
Create a folder on your local machine which will contain all the sources of the app we’re going to build. We’ll refer to this folder as the “app root folder”.
webapp (New)
Create a new folder named webapp in the app root folder. It will contain all the sources that become available in the browser later. We’ll refer to this folder as the “webapp folder”.
webapp/index.html (New)
In our webapp folder, we create a new HTML file named index.html and copy the following content to it:
<!DOCTYPE html>
<html>
	<head>
		<meta charset="utf-8">
		<title>Quickstart Tutorial</title>
		<script id="sap-ui-bootstrap"
			src="resources/sap-ui-core.js"
			data-sap-ui-libs="sap.m"
			data-sap-ui-compat-version="edge"
			data-sap-ui-async="true"
			data-sap-ui-on-init="module:ui5/tutorial/quickstart/index"
			data-sap-ui-resource-roots='{
				"ui5.tutorial.quickstart": "./"
			}'>
		</script>
	</head>
	<body class="sapUiBody" id="content"></body>
</html>
With the script tag, we load and initialize OpenUI5 with typical bootstrap parameters. We define, for example, a theme, control libraries, as well as performance and compatibility flags.
- The bootstrap property
resource-rootsdefines the namespace for all resources of the app. This way, we can easily reference additional files that we are about to create in this step. - The
indexmodule that we load with theonInitparameter will hold the application logic. - The
bodytag is defined with thesapUiBodyclass and thecontentID. This is where we will add the content of the app in the next steps.
webapp/index.ts/.js (New)
In your webapp folder, create a new file index.js that will be called as soon as OpenUI5 is loaded and initialized. We load two UI controls - a button and a message toast - and place the button in the element with the content ID. The button is defined with a text property and a callback attached to its press event.
// webapp/index.ts
import Button from "sap/m/Button";
import MessageToast from "sap/m/MessageToast";

new Button({
	text: "Ready...",
	press() {
		MessageToast.show("Hello World!");
	}
}).placeAt("content");
// webapp/index.js
sap.ui.define([
	"sap/m/Button",
	"sap/m/MessageToast"
], (Button, MessageToast) => {
	"use strict";

	new Button({
		text: "Ready...",
		press() {
			MessageToast.show("Hello World!");
		}
	}).placeAt("content");
});
webapp/manifest.json (New)
Create a new file named manifest.json in the webapp folder; it’s also known as the “app descriptor”. All application-specific configuration options which we’ll introduce in this tutorial will be added to this file. Enter the following content:
{
  "_version": "2.8.0",
  "sap.app": {
    "id": "ui5.tutorial.quickstart"
  }
}
📝 In this tutorial step, we focus on adding the absolute minimum configuration to the app descriptor file. In certain development environments you might encounter validation errors due to missing settings. However, for the purposes of this tutorial you can safely ignore these errors. In Step 10: Descriptor for Applications we’ll examine the purpose of the file in detail and configure some further options.
Development Environment
The following steps are tailored for using this project with UI5 CLI.
package.json (New)
Create a new file called package.json which will enable you to execute commands and consume packages from thenpm registry via the npm command line interface.
Enter the following content:
{
  "name": "ui5.tutorial.quickstart",
  "version": "1.0.0",
  "description": "The UI5 quickstart tutorial",
  "scripts": {
    "start": "ui5 serve -o index.html"
  }
}
TypeScript Setup
To work with TypeScript, we must install it in our project. To do this, we execute the following command in the terminal:
npm install typescript --save-dev
By running this command, npm will download the TypeScript package from the npm registry and install it in our project’s “node_modules” directory. It will also add an entry for TypeScript in the “devDependencies” section of our package.json file, so that other developers working on the project can easily install the same version of TypeScript.
tsconfig.json (New)
As a next step, we need to create the file tsconfig.json in the app root directory to indicate that this folder is the root of a TypeScript project. This file specifies various compiler options and project settings that affect how TypeScript code is compiled into JavaScript.
We specify the compiler options as follow:
{
  "compilerOptions": {
  "target": "es2023",
  "types": [
    "@openui5/types"
  ],
  "skipLibCheck": true,
  "allowJs": true,
  "strictPropertyInitialization": false,
  "rootDir": "./webapp",
  "paths": {
    "ui5/tutorial/quickstart/*": [
    "./webapp/*"
    ]
  }
  },
  "include": [
  "./webapp/**/*"
  ]
}
Let’s go through the compiler options specified in the file:
-
"target": "es2023": Thetargetparameter sets the JavaScript language level that the TypeScript code should be compiled down to. We set it toes2023, which means the generated JavaScript code is compatible with ECMAScript 2023. -
"types": ["@openui5/types"]: Thetypesparameter defines the types used for TypeScript code. We configure this parameter to use the OpenUI5 types delivered by the@openui5/typespackage. -
"skipLibCheck": true: When theskipLibCheckparameter is set totrue, it tells the compiler to skip type checking of declaration files (.d.tsfiles) that are part of external libraries. This can improve compilation speed. -
"allowJs": true: TheallwJsparameter allows JavaScript files to be included in the TypeScript project. This option enables TypeScript to compile JavaScript code along with TypeScript code. -
"strictPropertyInitialization": false: ThestrictPropertyInitializationparameter is a specific type of strict check that ensures that each instance property of a class gets initialized in the constructor body, or by a property initializer. By setting this to false, it disables strict checking of uninitialized class properties. This means that class properties can be left uninitialized or assigned the valueundefinedwithout causing a compiler error. -
"rootDir": "./webapp": TherootDirparameter specifies the root directory of the TypeScript source files. The compiler considers this directory as the starting point for resolving file paths. We set it to ourwebappfolder. -
"paths": { "ui5/tutorial/quickstart/*": ["./webapp/**/*"] }: Thepathparamter specifies path mappings for module resolution. It allows you to define custom module paths that map to specific directories or files. In this case, it maps the module pathui5/tutorial/quickstart/*. -
"include": [ "./webapp/**/*" ]: Specifies an array of filenames or patterns to include in TypeScript compilation.
UI5 CLI
Next, we install the UI5 CLI and add it as development dependency to our project. For this, we open a terminal in the app root folder and execute the following command:
npm install --save-dev @ui5/cli
Finally, we initialize the UI5 CLI configuration for our project by executing the following command on the app root folder:
ui5 init
This will generate a ui5.yaml file in the app root directory, which is essential for using UI5 CLI with our project.
To use OpenUI5, execute the following command:
ui5 use OpenUI5
To install the required OpenUI5 libraries, execute the following command:
ui5 add sap.m sap.tnt sap.ui.core sap.ui.layout themelib_sap_horizon
Let’s enhance our tooling setup once again by installing some custom middleware for the ui5-server. This will help us handle our development project more efficiently.
We open a terminal and navigate to the root folder of our app. Then, we execute the following command:
npm install ui5-middleware-livereload ui5-middleware-serveframework ui5-tooling-transpile --save-dev
npm install ui5-middleware-livereload ui5-middleware-serveframework --save-dev
When you run the command, npm will download the specified packages from the npm registry and store them in a folder called node_modules within your project directory. The --save-dev flag instructs npm to save these packages as development dependencies in the devDependencies section of the package.json file. Development dependencies are packages that are only needed during development and not in production. By separating them from production dependencies, we can keep our project clean and ensure that only the required packages are included when deploying the application.
Let’s break down what each package does:
-
ui5-middleware-livereloadis a middleware plugin for the UI5 CLI that enables live reloading of your application in the browser. Live-reloading means that whenever you make changes to your code, the browser automatically refreshes and displays the updated version without requiring manual refreshes (e.g. upon Save). -
ui5-middleware-serveframeworkis another middleware plugin for the UI5 CLI that provides a web server to serve your OpenUI5 project during development. It allows you to easily serve the necessary OpenUI5 libraries and resources required by your application from your development environment.
ui5-tooling-transpileis a plugin for the UI5 CLI that transpiles modern JavaScript (ES6+) and TypeScript into a compatible version for OpenUI5. OpenUI5 is based on older versions of JavaScript, so this plugin allows you to take advantage of the latest language features and syntax while ensuring that your code remains compatible with OpenUI5.
ui5.yaml
Next, we have to configure the tooling extension we installed from npm to our UI5 CLI setup, so we can use it in our project. To hook a custom task into a certain build phase of a project, it needs to reference another task that will get executed before or after it. The same applies for a custom middleware:
- For the
ui5-tooling-transpile-taskwe specify that this should happen after thereplaceVersiontask.
- All our custom middleware extensions will be called after the
compressionmiddleware.
ℹ️ Middleware configurations are applied in the order in which they are defined.
builder:
  customTasks:
  - name: ui5-tooling-transpile-task
    afterTask: replaceVersion
server:
  customMiddleware:
  - name: ui5-tooling-transpile-middleware
    afterMiddleware: compression
  - name: ui5-middleware-serveframework
    afterMiddleware: compression
  - name: ui5-middleware-livereload
    afterMiddleware: compression
Now you can benefit from live reload on changes, built framework resources at development time, and make use of TypeScript in OpenUI5.
server:
  customMiddleware:
  - name: ui5-middleware-serveframework
    afterMiddleware: compression
  - name: ui5-middleware-livereload
    afterMiddleware: compression
Now you can benefit from live reload on changes and built framework resources at development time.
📝 During its initial run, the
ui5-middleware-serveframeworkmiddleware will build the framework, which can take a while. In all following steps, the build will not happen again and the framework is served from the built resources.
To start the web server and to open a new browser window hosting your newly created index.html, execute the following command:
npm start
Conventions
- The
index.htmlfile is located in thewebappfolder.
Next: Step 2: Steady…
Related Information
Descriptor for Applications, Components, and Libraries (manifest.json)