tutorials
Step 11: Validation Using sap/ui/core/Messaging
Up to this point, we’ve created a currency field that formats itself correctly. The currency data type can also validate user input to ensure it meets currency requirements. However, OpenUI5 manages data type validation functions and doesn’t have a built-in mechanism for reporting error messages back to the UI. We therefore need a way to report error messages from validation functions back to the user. In this step, we’re enabling validation for the entire app with a feature known as “Messaging”. Once this is set up, any validation error messages based on user input get passed to Messaging, which then connects them to the appropriate view and control that caused the error.
Preview
An error message is displayed upon entering text into the currency amount input field
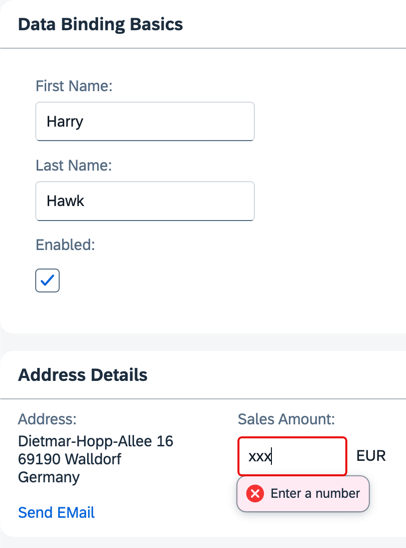
You can view this step live: 🔗 Live Preview of Step 11.
Coding
You can download the solution for this step here: 📥 Download step 11 (TS)📥 Download step 11 (JS).
Folder structure for this step
webapp/
├── controller/
│   └── App.controller.ts/.js
├── i18n/
│   ├── i18n.properties
│   └── i18n_de.properties
├── model/
│   └── data.json
├── view/
│   └── App.view.xml
├── Component.ts/.js
├── index.html
└── manifest.json
webapp/manifest.json
To generally enable validation in the app, add the handleValidation property into the sap.ui5 section of the manifest.json file as shown below.
...
    "sap.ui5": {
        "handleValidation": true,
        ...
    }
...
Now, try entering a non-numeric value into the Sales Amount field and either press [Enter] or move the focus to a different UI control. This action triggers either the onenter or onchange event. OpenUI5 then executes the validation function for the sap.ui.model.type.Currency data type.
With validation handling enabled in the manifest, any validation error messages will be picked up by Messaging. It checks its list of registered objects and passes the error message back to the correct view for display.
You’ll notice that the field in error has a red border:
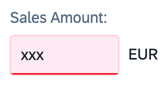
However, the error message only displays when that particular field is in focus:
Next: Step 12: Aggregation Binding Using Templates
Previous: Step 10: Property Formatting Using Data Types
Related Information