tutorials
Step 1: No Data Binding
In this step, we create a basic application and simply place some text on the screen using a standard sap.m.Text control. The text in this control is a hard-coded part of the control’s definition; therefore, this is not an example of data binding!
Preview
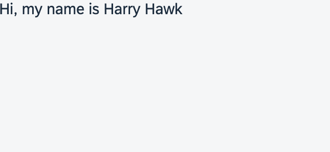
You can view this step live: 🔗 Live Preview of Step 1.
Setup
Open a terminal and install UI5 Tooling globally on your machine by executing the following command:
npm install --global @ui5/cli
Coding
You can download the solution for this step here: 📥 Download step 1 (TS)📥 Download step 1 (JS).
Folder structure for this step
webapp/
├── view/
│   └── App.view.xml
├── Component.ts/.js
├── index.html
└── manifest.json
-
Create a folder on your local machine which will contain all the sources of the app we’re going to build. We’ll refer to this folder as the “app root folder”.
-
Create a new file called
package.jsonwhich will enable you to execute commands and consume packages from the npm registry via the npm command line interface. Enter the following content:
package.json (New)
{
  "name": "ui5.tutorial.databinding",
  "private": true,
  "version": "1.0.0",
  "author": "SAP SE",
  "description": "UI5 Demo App - Data Binding Tutorial",
  "scripts": {
    "start": "ui5 serve -o index.html"
  }
}
-
Create a new folder named
webappin the app root folder. It will contain all the sources that become available in the browser later. We’ll refer to this folder as the “webapp folder”. -
Create a new HTML file named
index.htmlin your webapp folder and enter the following content:
webapp/index.html (New)
<!DOCTYPE html>
<html>
<head>
	<meta charset="utf-8">
	<meta name="viewport" content="width=device-width, initial-scale=1.0">
	<title>Data Binding Tutorial</title>
	<script
		id="sap-ui-bootstrap"
		src="resources/sap-ui-core.js"
		data-sap-ui-theme="sap_horizon"
		data-sap-ui-compat-version="edge"
		data-sap-ui-async="true"
		data-sap-ui-on-init="module:sap/ui/core/ComponentSupport"
		data-sap-ui-resource-roots='{
			"ui5.tutorial.databinding": "./"
		}'>
	</script>
</head>
<body class="sapUiBody" id="content">
	<div data-sap-ui-component data-name="ui5.tutorial.databinding" data-id="container" data-settings='{"id" : "databinding"}'></div>
</body>
</html>
- Create a new file named
manifest.jsonin the webapp folder; it’s also known as the “app descriptor”. All application-specific configuration options which we’ll introduce in this tutorial will be added to this file. Enter the following content:
webapp/manifest.json (New)
{
  "_version": "2.8.0",
  "sap.app": {
    "id": "ui5.tutorial.databinding",
    "type": "application",
    "applicationVersion": {
      "version": "1.0.0"
    },
    "title": "Data Binding Tutorial",
    "description": "A simple app that explains how to use data binding features of OpenUI5"
  },
  "sap.ui": {
    "technology": "UI5",
    "deviceTypes": {
      "desktop": true,
      "tablet": true,
      "phone": true
    }
  },
  "sap.ui5": {
    "dependencies": {
      "minUI5Version": "1.148",
      "libs": {
        "sap.m": {},
        "sap.ui.core": {}
      }
    },
    "contentDensities": {
      "compact": true,
      "cozy": true
    },
    "rootView": {
      "viewName": "ui5.tutorial.databinding.view.App",
      "type": "XML",
      "id": "app"
    }
  }
}
- Create a new file named
Component.ts/.jsin the webapp folder. Enter the following content:
webapp/Component.ts/.js (New)
// webapp/Component.ts
import UIComponent from "sap/ui/core/UIComponent";

/**
 * @namespace ui5.tutorial.databinding
 */
export default class Component extends UIComponent {
	public static metadata = {
		interfaces: ["sap.ui.core.IAsyncContentCreation"],
		manifest: "json"
	};
}
// webapp/Component.js
sap.ui.define(["sap/ui/core/UIComponent"], function (UIComponent) {
	"use strict";

	return UIComponent.extend("ui5.tutorial.databinding.Component", {
		metadata: {
			interfaces: ["sap.ui.core.IAsyncContentCreation"],
			manifest: "json"
		}
	});
});
- Create a new folder named
viewin the webapp folder. Then, create a new fileApp.view.xmlwithin theviewfolder. We start by placing thesap.m.Textcontrol into the XML view. Since the value of the control’s text property is hard-coded, it doesn’t relate to any data that might exist within a model object. Therefore, data binding is not used here.
webapp/view/App.view.xml (New)
<mvc:View
	xmlns="sap.m"
	xmlns:mvc="sap.ui.core.mvc">
	<Text text="Hi, my name is Harry Hawk"/>
</mvc:View>
-
Open a terminal in the app root folder and execute
npm i -D @ui5/clito install UI5 Tooling in the app root folder. -
Execute
ui5 initin the app root folder. -
Execute
ui5 use OpenUI5 -
Execute
ui5 add sap.m sap.ui.core sap.ui.layout themelib_sap_horizon -
Configure the tooling extensions we installed from npm in our UI5 Tooling setup, so we can use them in our project:
ui5.yaml
specVersion: "4.0"
metadata:
  name: "ui5.tutorial.databinding"
type: application
framework:
  name: OpenUI5
  version: "1.148.1"
  libraries:
    - name: sap.m
    - name: sap.ui.core
    - name: sap.ui.layout
    - name: themelib_sap_horizon
builder:
  customTasks:
  - name: ui5-tooling-transpile-task
    afterTask: replaceVersion
server:
  customMiddleware:
  - name: ui5-tooling-transpile-middleware
    afterMiddleware: compression
  - name: ui5-middleware-serveframework
    afterMiddleware: compression
  - name: ui5-middleware-livereload
    afterMiddleware: compression
- Execute
npm startto start the web server and to open a new browser window hosting your newly createdindex.html.
Next: Step 2: Creating a Model
Related Information