docs
Step 1: Ready…
Let’s get you ready for your journey! We bootstrap OpenUI5 in an HTML page and implement a simple “Hello World” example.
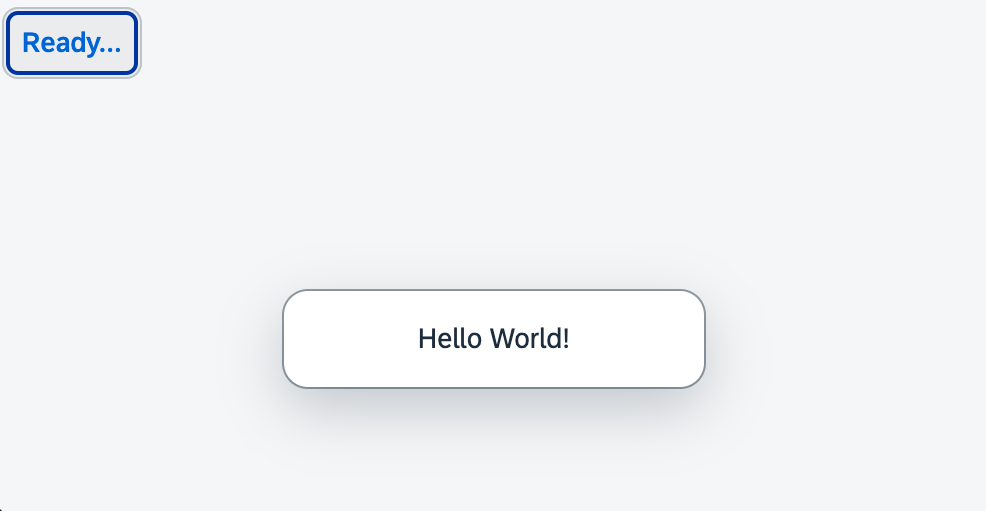
Preview
The browser shows a “Ready” button that triggers a “Hello World” message

Setup
Open a terminal and install UI5 CLI globally on your machine by executing the following command:
npm install --global @ui5/cli
Coding
You can view and download all files at Quick Start - Step 1.
- Create a folder on your local machine which will contain all the sources of the app we’re going to build. We’ll refer to this folder as the “app root folder”.
-
Create a new file called
package.jsonwhich will enable you to execute commands and consume packages from thenpm registry via the npm command line interface. Enter the following content:package.json (New)
{ "name": "ui5.quickstart", "version": "1.0.0", "description": "The UI5 quickstart tutorial", "scripts": { "start": "ui5 serve -o index.html" } } -
Create a new folder named
webappin the app root folder. It will contain all the sources that become available in the browser later. We’ll refer to this folder as the “webapp folder”. -
Create a new HTML file named
index.htmlin your webapp folder and enter the following content:webapp/index.html (New)
<!DOCTYPE html>
<html>
<head>
	<meta charset="utf-8">
	<title>Quickstart Tutorial</title>
	<script id="sap-ui-bootstrap"
		src="resources/sap-ui-core.js"
		data-sap-ui-libs="sap.m"
		data-sap-ui-compat-version="edge"
		data-sap-ui-async="true"
		data-sap-ui-on-init="module:ui5/quickstart/index"
		data-sap-ui-resource-roots='{
			"ui5.quickstart": "./"
		}'>
	</script>
</head>
<body class="sapUiBody" id="content"></body>
</html>
With the
scripttag, we load and initialize OpenUI5 with typical bootstrap parameters. We define, for example, a theme, control libraries, as well as performance and compatibility flags.First, we need a source to load OpenUI5 from. In this tutorial, we will use UI5 CLI to host the OpenUI5 resources.
The bootstrap property
resourcerootsdefines the namespace for all resources of the app. This way, we can easily reference additional files that we are about to create in this step.The
indexmodule that we load with theonInitparameter will hold the application logic.The
bodytag is defined with thesapUiBodyclass and thecontentID. This is where we will add the content of the app in the next steps. -
In your
webappfolder, create a new fileindex.jsthat will be called as soon as OpenUI5 is loaded and initialized.webapp/index.js (New)
sap.ui.define([
	"sap/m/Button",
	"sap/m/MessageToast"
], (Button, MessageToast) => {
	"use strict";

	new Button({
		text: "Ready...",
		press() {
			MessageToast.show("Hello World!");
		}
	}).placeAt("content");

});
We load two UI controls - a button and a message toast - and place the button in the element with the
contentID. The button is defined with atextproperty and a callback attached to itspressevent. -
Create a new file named
manifest.jsonin the webapp folder; it’s also known as the “app descriptor”. All application-specific configuration options which we’ll introduce in this tutorial will be added to this file. Enter the following content:webapp/manifest.json (New)
{ "_version": "1.58.0", "sap.app": { "id": "ui5.quickstart" } } -
Open a terminal in the app root folder and execute
npm i -D @ui5/clito install UI5 CLI. -
Execute
ui5 initin the app root folder. -
Execute
ui5 use OpenUI5 -
Execute
ui5 add sap.m sap.tnt sap.ui.core sap.ui.layout themelib_sap_horizon - Execute
npm startto start the web server and to open a new browser window hosting your newly createdindex.html.
Parent topic:Quickstart Tutorial
Previous:Step 2: Steady…
Related Information